I decided to make some bamboo wind chimes as gifts for various people in my life. The pole cost $3.75, I made two wind chimes out of it, and the process only took a couple of hours.
I'm not an avid wood worker and I'm not a professional. I had fun making this and I hope you do too! However, don't expect perfect results.
I did all of this at my kitchen table!
If you have questions please feel free to comment. All comments are emailed to me. I may edit this from time to time to clarify.
There are some tutorials online here and there, but nothing that I really liked, so I made up my own. Without further ado, here is the Bamboo Wind Chime Tutorial.

Materials
- Bamboo Pole
- Miter Box Saw
- Miter Saw Box
- 2 Clamps
- Drill
- 1/2, 3/8, 5/16, 5/64 and 1/16 Drill Bits
- Ruler
- Sandpaper
- Fishing Line
- Beads (optional)
I bought a length of bamboo from my local hardware store in the outdoor section. They have bamboo there that gardeners use for stakes. I found the pole with the largest diameter I could get, which was about 1". A pole with a larger bore would likely be easier to work with.
All of the tools I used can be found at a hardware store or in the garage of a handy person in your life (I used all of Terri's tools).
Step 2: Decide on graduated lengths that you will cut into the bamboo.
The length of the bamboo will affect the pitch that it sounds. It is best to have 1 1/2" or more of a difference between each length.
My 1/2" drill bit is a little over 4" long. Since later in the process I am going to drill out the bore of the bamboo the longest piece can't be more than 8". If you have an extension for your drill bits your longest piece can be longer.
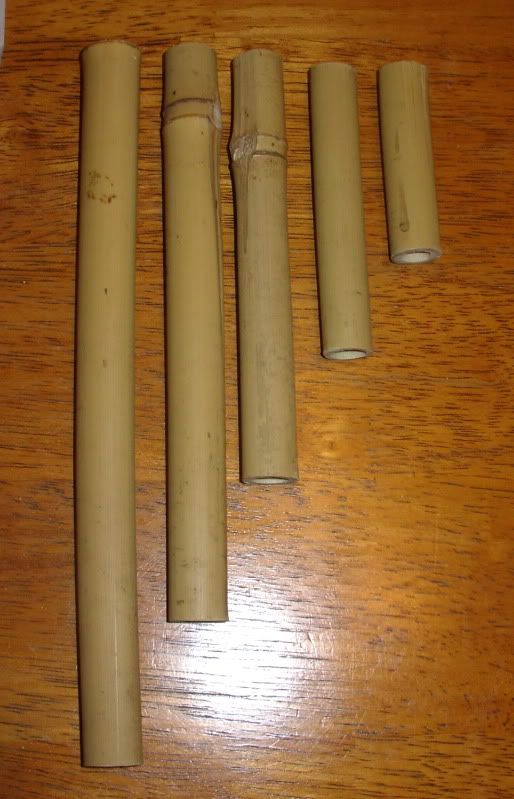
The lengths that I used for the wind chime in the picture are 8", 6 1/2", 5", 3 1/2", and 2".
Step 3: Cut the bamboo using your measurements.

Clamp the Miter Saw Box onto the edge of a sturdy table and then clamp the bamboo to the box. I'm right handed so I used my left hand to sturdy the box and used my right to saw. If you are left handed you can reverse the setup.
BE CAREFUL AND WEAR GOGGLES.
Cut your longest piece from the widest end of the bamboo. Continue on up the bamboo so that as each piece is gradually shorter it is also gradually smaller in diameter.
Once you start sawing don't stop! Just have at it.
Sometimes the edge of the bamboo might splinter. When this happened I would take the clamp off and rotate the bamboo so the side that is left to saw through is closer to the top. Be careful if you do this though, or you might end up with two saw marks in different spots.
After you are done sawing you should have bamboo lengths that look like this:
Step 4: Drill out the inside of the bamboo.
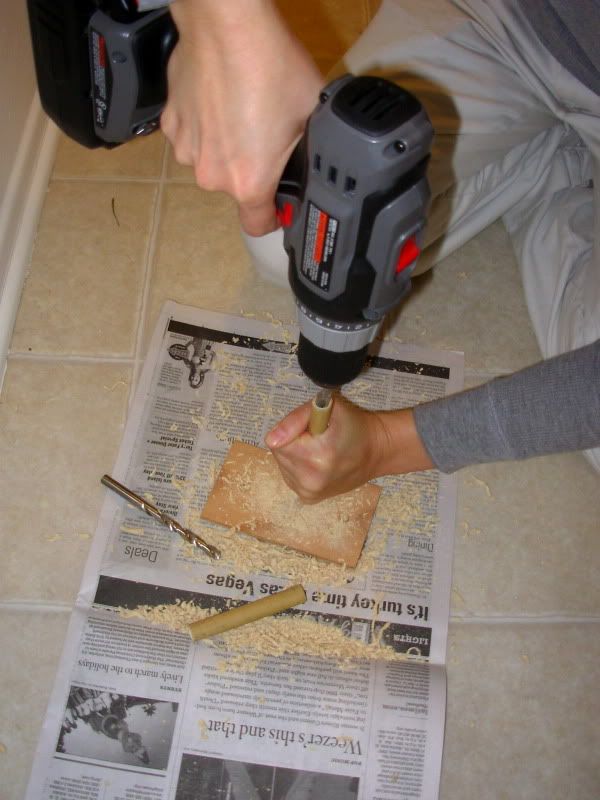
Hold the base of the bamboo piece against the ground and use the 1/2" drill bit to clear out the center of the bamboo. If you have trouble starting it you can use a slightly smaller bit first.
This takes some practice if you are like me and have rarely used a drill. I practiced on some scrap pieces before drilling into my project pieces. Some tips include to let the weight of the drill do most of the work. You don't need to really press into the bamboo. Make sure that you periodically take the drill out of the bamboo to empty the bit.
You must have a very firm grip on the bamboo or this will not work! If you have access to a garage full of tools there might be a vise or something like it that could hold the bamboo for you.
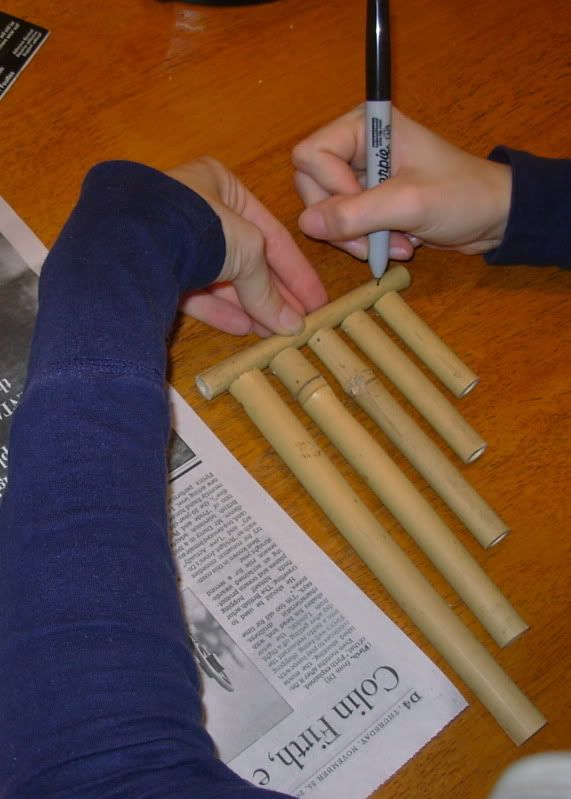
Step 5: Measure and cut a length of bamboo for the top.

With all your pieces ready to go you now can measure for the top piece. Lay out the bamboo on the table with a small gap in between each piece, about a quarter of an inch. This space will give the pieces room to move.
Mark the bamboo at the point where you will cut it. You want the length to have a little bit of overhang over the two edges.
Step 6: Measure and mark 1/8" from the top on opposite sides of the piece where you will drill the holes for the top of the bamboo.

Imagine you are going to drill straight through the pole. This would produce two holes on opposite sides of the piece. This is what you are going to mark, but not what you are going to do.
Step 7: Using the 5/64" bit, drill through one side of the bamboo, turn the piece over, and drill the hole in the other side. Have your cat supervise.

My Miter Saw Box had a groove in it that held the bamboo nicely. I used a clamp to hold the smaller pieces in place while drilling.
You want to turn your piece over instead of drilling straight through because the bamboo will not split as much if you do it this way.
Step 8: Lay out and mark the top where you will drill holes for the top piece.
It is important to have your chimes all laid out where they will end up in the end. Mark on top of the top piece where the middle of each chime is.
Step 9: Drill through the top piece on your marks using the 1/16" bit.

This time you are going to drill straight through the piece of bamboo. This will mean that there will probably be some light splintering in the wood, but it's on the bottom and the next step will take care of that.
Step 10: Sand any rough edges.

Any hanging pieces of bamboo or rough edges can be sanded away. This doesn't need to be perfect, just enough to get the rough edges out.
If you want to paint or stain your wind chimes you can go to town sanding and then paint or stain.
Step 11: Thread your chimes together.
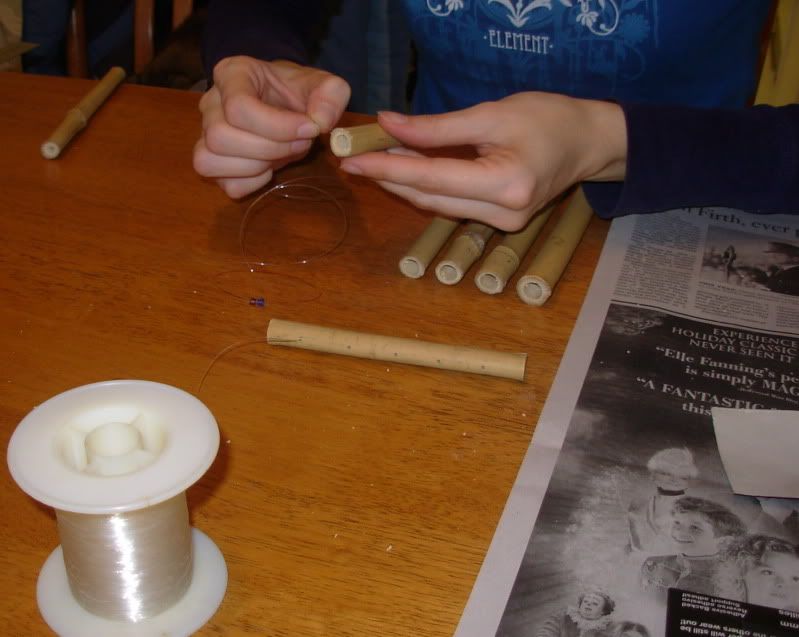
Using fishing line go through the top of your top piece and come out the bottom. Thread a bead or two on the line. Thread the bamboo piece on going through one side and coming out the other. Go back up through the beads again and up the same hole in the top piece. Go down the next hole in the top piece and repeat the process.
Once you are done threading tighten everything up and straighten any of the chimes out that might be crooked. The fishing line should be coming up out the two sides of the top piece. Tie a knot at either edge flush with the top piece to prevent the line from moving around.
Step 12: Tie two knots in the top to hang the chimes by.
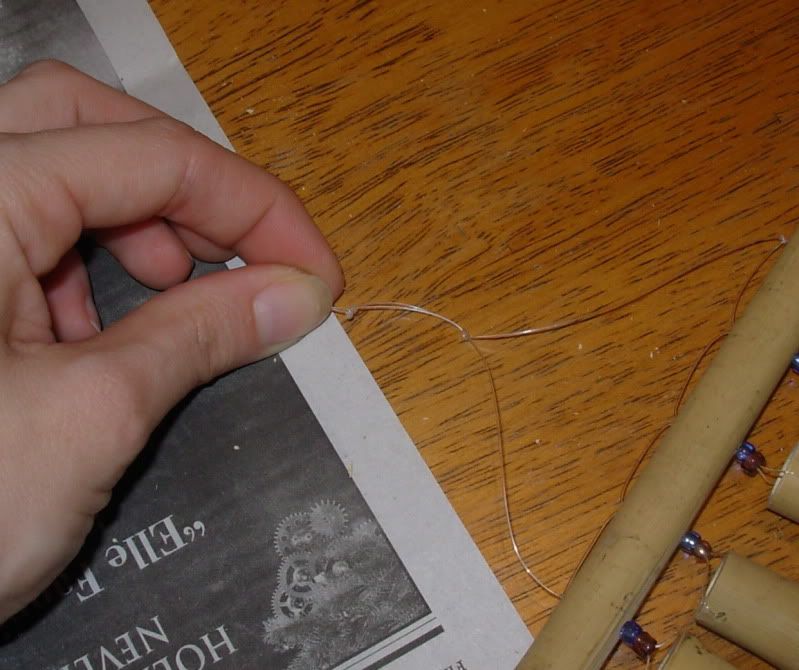
Holding the chimes up tie your first knot so that the chimes are not slanted one way or the other. Tie a second knot about 3/4" lower. This loop is where the chime will hang. You could also attach a key ring here instead.
***
All images and text are my own personal property and you have every right to share the link but no right to claim this as your own.
1 comment:
Since you were using a miter box, you could have easily cut one end of the bamboo sections at a 45 degree angle for a nicer look.
Post a Comment